0+
Years of experience0+
Clients0+
ProjectsWhat we do
Data and AI
Our Data and AI practice is designed to help organizations convert data into actionable insights.We offer end-to-end data solutions, starting with understanding your business objectives to identify and process the right data. Our team uses advanced visualization techniques to uncover valuable insights, and employs AI models for predictive analytics.
Learn MoreProduct Engineering
Having an idea and developing it into a product is as challenging as it is exciting. Our work spanning startups to larger enterprises have enabled us to create a process that allows us to quickly bring a product idea to life. Be it a start-up or a mature business this is the process we recommend. Here is a quick overview of the phases without any jargon.
Learn MoreCloud Consulting
Our cloud consulting practice is centered around helping businesses leverage the potential of the cloud. Our expertise in leading platforms such as AWS, Azure, and GCP enable us to provide custom solutions that fit your business needs.
Learn MoreOur products
PACdock - an efficient, flexible, and secure solution to track, reserve, and manage your organization's assets. Get precision asset control for complete asset clarity. Enhance asset utilization and eliminate confusion over location and user assignments.
Learn More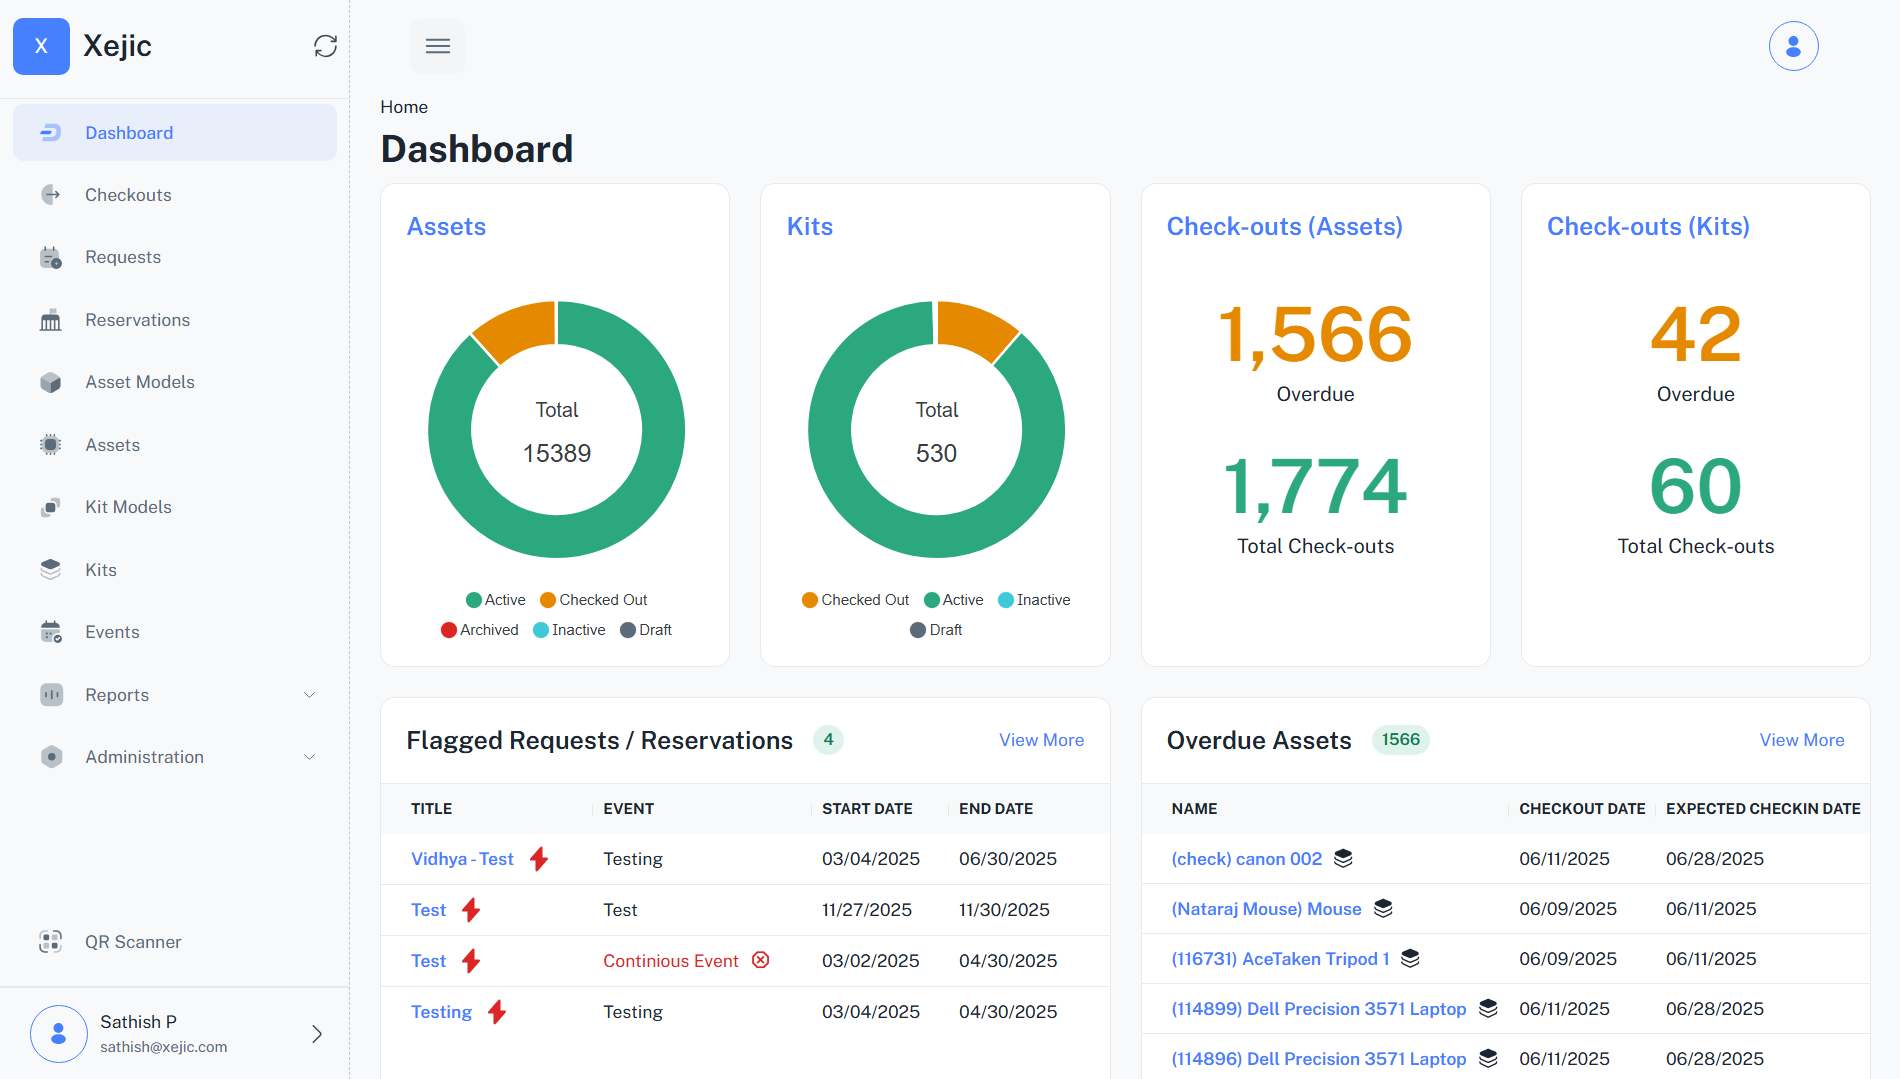

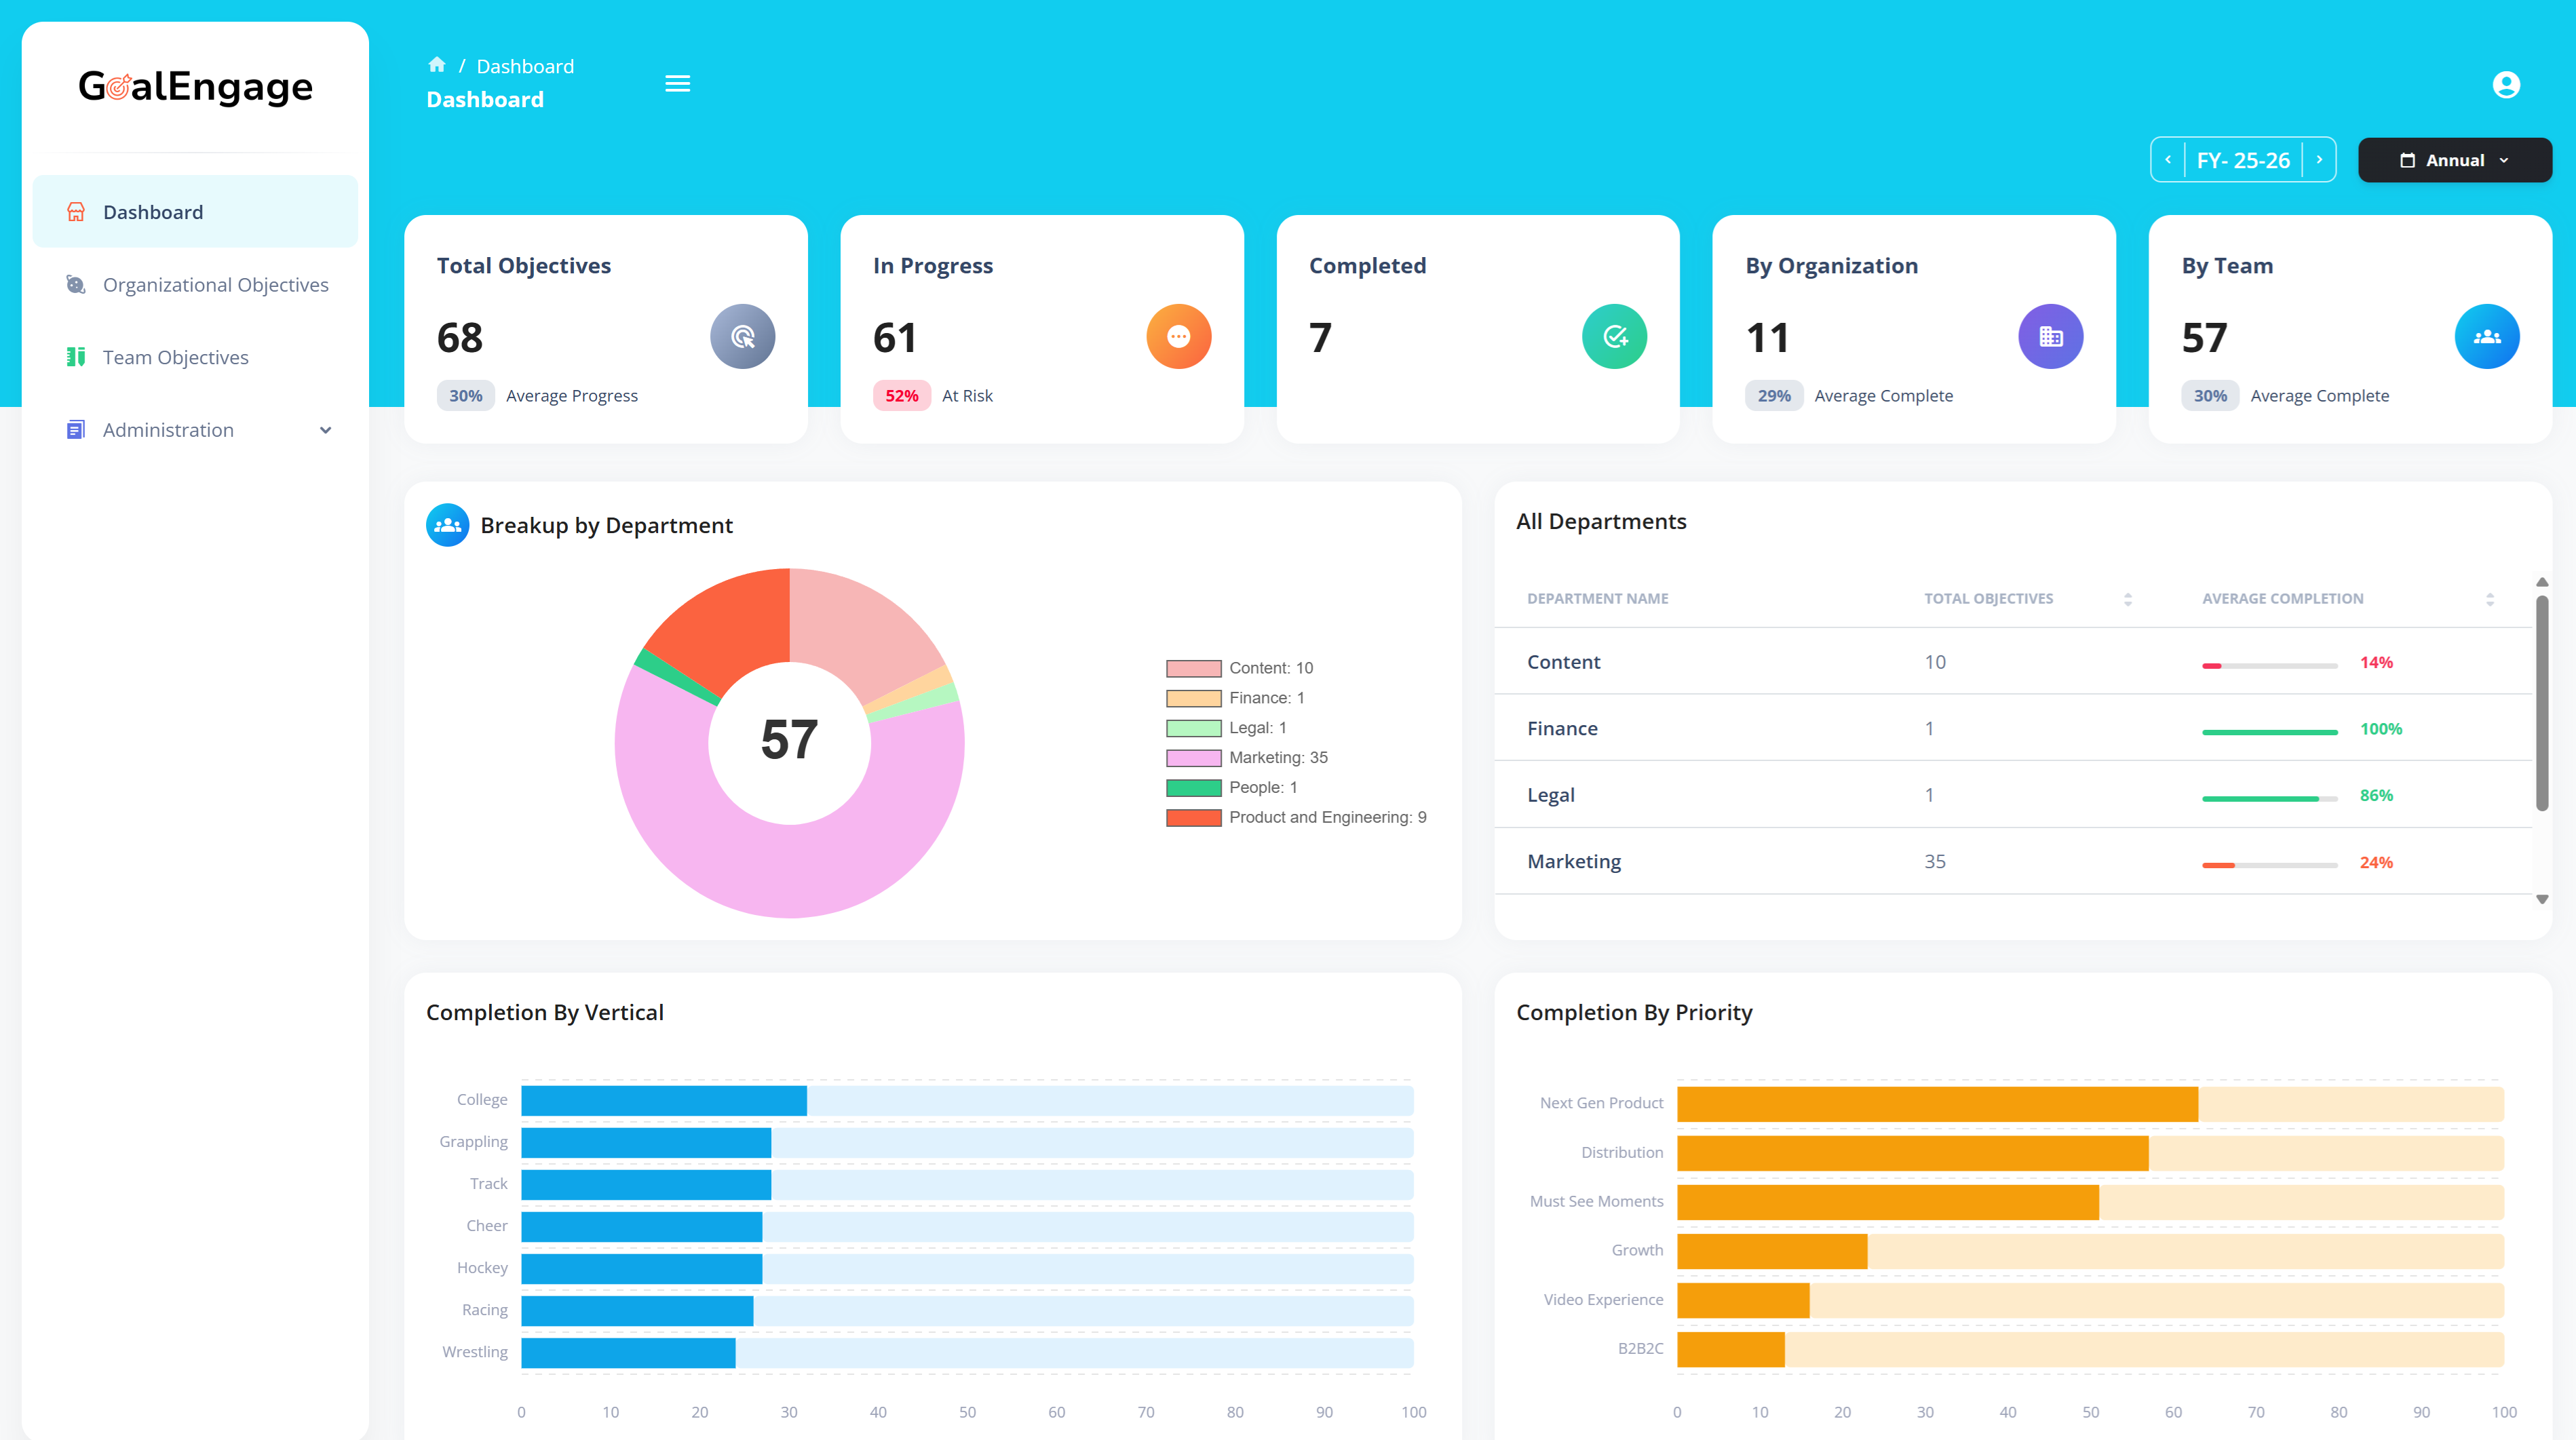
GoalEngage — The powerful OKR platform
Easily enable teams to define, align on, and track goals. GoalEngage makes it easy to set objectives, measure progress, and stay focused on what truly drives results.
Learn More